How to Install a Cat 6 Patch Panel for Optimal Network Performance
In today's fast-paced digital world, having a reliable and efficient network is essential for both home and business environments. One critical component that significantly influences network performance is the cat 6 patch panel. This device acts as a central point for connecting various network cables, ensuring that data transmission remains seamless and effective. The installation of a cat 6 patch panel not only streamlines cable management but also enhances the overall connectivity of your network setup, allowing for faster speeds and reduced latency.
When considering how to install a cat 6 patch panel, it is important to follow best practices to maximize its benefits. From selecting the right location to understanding the wiring process, each step plays a vital role in achieving optimal performance. Proper installation can help in minimizing signal interference and maintaining high-quality connections among all devices. Moreover, with the appropriate setup, users can future-proof their network, accommodating increased bandwidth demands as technology evolves. In this guide, we will explore the essential steps and tips for effectively installing a cat 6 patch panel, ensuring that your network is equipped to handle both current and future demands.

Understanding the Importance of a Cat 6 Patch Panel for Network Efficiency
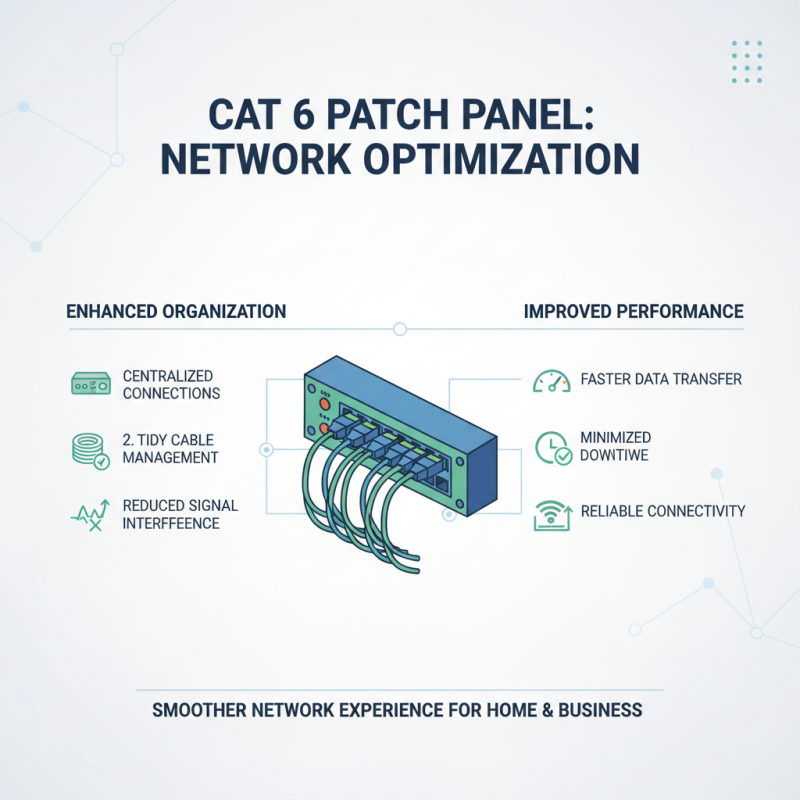
A Cat 6 patch panel plays a crucial role in achieving optimal network performance. By centralizing connections between various devices, it enhances organization and facilitates trouble-free management of network cables. This tidy arrangement reduces signal interference and ensures more efficient data transmission, which is vital for both residential and commercial networks. The improved network efficiency not only heightens the speed of data transfer but also minimizes downtime, leading to a better overall user experience.
Tips for enhancing your network efficiency include ensuring that all cables are of high quality and properly seated in the patch panel. Avoid bending or kinking cables, as this could impact their performance. Additionally, consider labeling ports on the patch panel to facilitate easy identification and troubleshooting. This organization will save you time and frustration when addressing network issues or expansions.
Moreover, regularly inspecting and maintaining your patch panel will help in identifying potential problems early. Keep the area around the patch panel clean and free from dust accumulation to prevent overheating and ensure longevity. By taking these steps, you’ll create a reliable infrastructure that supports optimal network performance while effectively accommodating future growth.
Gathering Necessary Tools and Materials for Installation
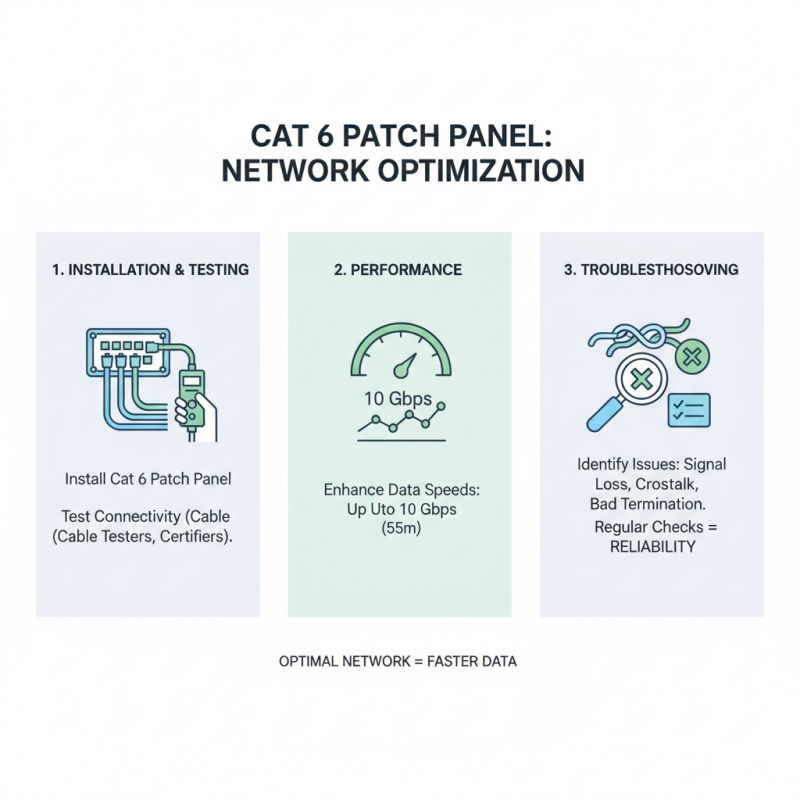
When preparing to install a Cat 6 patch panel, gathering the necessary tools and materials is crucial to ensure a smooth and efficient process. According to industry standards, an organized workstation with the right equipment not only enhances productivity but also significantly minimizes the risk of errors. Essential tools for this installation include a punch-down tool, a wire stripper, and a cable tester. The punch-down tool is particularly important, as it securely connects the individual wires to the patch panel, while a cable tester ensures that the connections are functioning properly, reducing potential future network issues.
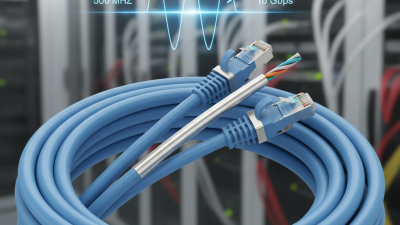
In addition to the tools, having the appropriate materials at hand is equally essential. Standardization in cabling practices demonstrates that using high-quality Cat 6 cabling can lead to enhanced performance, with data transfer rates up to 10 Gbps over distances of up to 55 meters. Therefore, ensuring that you have sufficient length of compliant Cat 6 cables and connectors is vital. Furthermore, a blank patch panel, rack mount hardware, and cable management accessories are also important components that contribute to not only a functional installation but also to the overall neatness and organization of your network setup. Proper preparation with these tools and materials can lead to optimal network performance, highlighting the importance of meticulous planning in installation processes.
How to Install a Cat 6 Patch Panel for Optimal Network Performance
| Tool/Material |
Description |
Quantity Needed |
| Cat 6 Patch Panel |
A device to organize and connect multiple network cables. |
1 |
| RJ45 Connectors |
Connectors used for terminating Ethernet cables. |
10 |
| Ethernet Cable (Cat 6) |
High-speed network cable for connections. |
100 ft |
| Wire Stripper |
Tool to strip insulation off wires. |
1 |
| Punch Down Tool |
Tool to insert wires into the patch panel. |
1 |
| Cable Management Clips |
Clips for organizing and securing cables. |
Pack of 20 |
| Network Tester |
Device to test network connectivity. |
1 |
Step-by-Step Guide to Installing Your Cat 6 Patch Panel
Installing a Cat 6 patch panel can greatly enhance your network's performance by providing a centralized point for managing multiple Ethernet connections. The first step is to choose an appropriate location for the patch panel, ideally in a cool, dry area that is easily accessible for maintenance. Once the location is decided, gather the necessary tools, including a punch down tool, wire cutters, and a screwdriver.
Begin the installation by mounting the patch panel to the wall or equipment rack. Ensure it’s securely fastened to prevent any movement. Next, prepare your Cat 6 cables by stripping the insulation off the ends and separating the individual wires according to the T568A or T568B wiring standard, depending on your existing network configuration. Carefully insert each wire into the corresponding slots on the patch panel and use the punch down tool to secure them in place.
Once all cables are connected, label each port for easy identification. Finally, connect the panel to a network switch through the corresponding ports and test each connection to ensure optimal performance. By following these steps, you’ll create a well-organized and efficient network setup that can handle high-speed data transmission.
Network Performance Metrics for Cat 6 Patch Panel Installation
Testing and Troubleshooting Network Connectivity After Installation
After installing a Cat 6 patch panel, testing and troubleshooting network connectivity is crucial to ensure optimal performance. A well-configured network can significantly enhance data transmission speeds, with Cat 6 cables capable of supporting up to 10 Gbps at distances up to 55 meters. According to industry standards, regular testing of the network infrastructure using tools like Ethernet cable testers and certification testers can help in identifying potential issues such as signal loss, crosstalk, or improper termination, which can degrade overall network performance.
For effective troubleshooting, professionals recommend conducting a thorough analysis of the entire setup. This includes checking the integrity of the cables, ensuring proper seating of connectors, and verifying the configuration of networking devices. Research shows that nearly 70% of network connectivity issues stem from poor cabling practices, including incorrect pinouts and inadequate strain relief. By adhering to best practices in installation and conducting comprehensive tests post-installation, users can mitigate these risks and maintain robust network performance. Regular maintenance checks, coupled with future-proofing the network infrastructure, are essential strategies for sustaining optimal connectivity in fast-paced environments.
Best Practices for Maintaining Your Cat 6 Patch Panel and Network Performance
Maintaining a Cat 6 patch panel is crucial for ensuring optimal network performance. Regular inspections can prevent significant issues down the line. Check the cables for any signs of wear or damage, ensuring that all connections are secure and free from dust. A clean patch panel will minimize signal loss, so consider using compressed air to clear any debris from the ports.
Tips:
1. Label each cable properly to avoid confusion, especially when troubleshooting or making changes to your network setup. This practice saves time and reduces the likelihood of connection errors.
2. Ensure proper cable management by using cable ties or Velcro straps. This not only keeps your setup organized but also enhances airflow, reducing the chances of overheating.
In addition to physical maintenance, monitor your network performance periodically using network monitoring tools. These tools can help identify bottlenecks and suggest improvements. Be sure to update any firmware associated with your network equipment to benefit from performance enhancements and security patches. This proactive approach ensures that your Cat 6 patch panel remains functional and that your network runs smoothly.