
Choosing the right Led Display Module involves more than comparing prices or pixel pitches. It affects brightness, viewing distance, power use, maintenance, and long-term reliability. A module that looks excellent in a showroom may appear weak under direct sunlight. It may also create uneven colors after months of operation.
Real installation experience shows that small details matter. Cabinet depth, refresh rate, waterproof protection, and magnetic access can change daily maintenance. For indoor signage, fine pixel density may create a sharper image at close range. Outdoor displays usually need stronger brightness and better environmental protection. Neither option is universally best.
This guide presents seven practical tips for making a confident choice. It considers display purpose, installation conditions, image quality, energy efficiency, serviceability, supplier credibility, and total ownership cost. Reliable manufacturers should provide clear specifications, testing records, warranty terms, and responsive technical support. Independent reviews and sample testing can reveal problems that brochures overlook.
Check the module closely.
A short viewing test helps. Observe skin tones, moving text, dark scenes, and brightness changes from different angles. Ask whether replacement parts will remain available after installation. That question is often missed.
No checklist is perfect. Some decisions still depend on budget, local climate, content style, and installer skill. Careful buyers should record these limits before ordering. A thoughtful evaluation reduces unpleasant surprises and supports a display that performs consistently in real conditions.
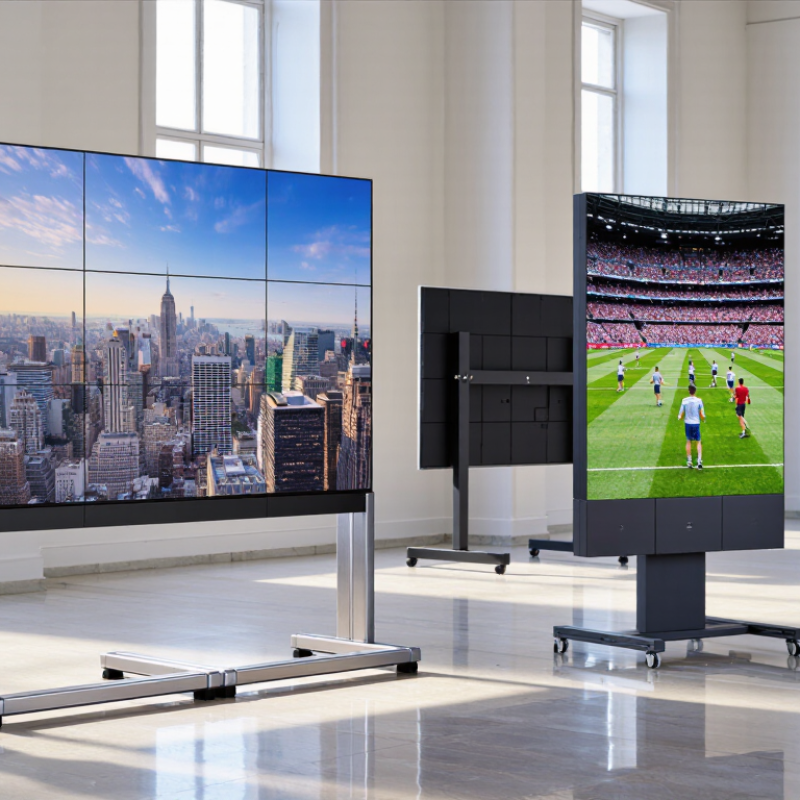
7 Tips for Choosing the Right LED Display Module
Define the Display’s Purpose, Location, and Viewing Conditions
Start with the message, not the module. A retail window needs bright, fast-changing content. A conference room needs calm colors and close viewing. Outdoor traffic displays need weather resistance, readable contrast, and stable operation. The OAAA reported that U.S. out-of-home advertising generated $9.1 billion in 2023, with digital formats accounting for about 32%. Location clearly affects commercial value.
Measure the viewing distance before choosing pixel pitch. A 3-millimeter pitch may suit viewers standing three to five meters away. A tighter pitch usually improves close-up detail, but it can raise cost and power use. That trade-off is easy to underestimate. Check ambient light at different times, especially near glass façades. The International Commission on Illumination recommends adapting display luminance to surrounding conditions, rather than using maximum brightness continuously.
For exterior installations, inspect the module’s ingress protection rating under IEC 60529. IP65 can resist dust and water jets, but it does not mean permanent immersion. Confirm operating temperature, ventilation, front or rear maintenance, and drainage paths. Also examine refresh rate for filmed content and grayscale performance for skin tones. These details come from field experience, not only specification sheets. I once treated a shaded entrance as an indoor space; afternoon reflections proved that assumption wrong. Measure the site twice.
Display brightness should match the installation environment. Controlled indoor spaces commonly use 800–1,200 nits, while semi-outdoor and outdoor displays require higher brightness to remain readable under ambient daylight. Confirm the final specification with an on-site light assessment, viewing distance, content type, and local weather conditions.
7 Tips for Choosing the Right LED Display Module
Pixel pitch controls both image detail and comfortable viewing distance. A 2.5 mm module places pixels closer together than a 6 mm module, producing sharper text at short range. A useful field estimate is viewing distance in metres equals pixel pitch in millimetres multiplied by three. It is practical, not perfect.
For a reception screen viewed from 7 metres, a 2.5 mm pitch may look unnecessarily fine. A 4 mm pitch can reduce cost while preserving readable graphics. For a control room viewed from 3 metres, 1.5–2.5 mm usually offers cleaner lines and smaller text. Test real content, not only colourful demo footage. Small letters reveal weaknesses quickly.
ITU-R BT.2020 defines UHD formats up to 3840 × 2160 and 7680 × 4320 pixels. That resolution matters only when the screen size, processor, and viewing distance support it. AVIXA’s 2024 IOTA forecast places the professional audiovisual market above 300 billion dollars globally, reflecting strong demand for display systems. Bigger demand does not remove basic measurement errors. Measure the nearest viewer, the farthest viewer, and the content’s smallest text. A calculation may suggest 3 mm, yet glare, camera use, or poor eyesight can justify a finer pitch. The “ideal” choice is sometimes a compromise.
Brightness should match the installation environment, not simply reach the highest number. Indoor displays often need moderate brightness to prevent eye strain. Outdoor modules may require stronger output under direct sunlight. I have seen overly bright panels look harsh at dusk. Check brightness in actual conditions, preferably at different times of day. Ask how measurements were taken, because test methods can vary.
Color performance depends on more than a wide color gamut. Examine skin tones, gray gradients, and dark scenes on sample content. Accurate calibration should produce consistent colors across the entire display. Small differences between modules become obvious on large walls. Viewing angle matters too. Colors can shift when people move sideways. A practical test is useful. Display photographs, text, and natural video before selecting a module.
Refresh rate affects motion clarity and camera performance. A higher rate can reduce flicker and visible scan lines during filming. This matters in studios, events, classrooms, and retail spaces with security cameras. However, refresh rate alone does not guarantee smooth images. Processing quality, scan design, and signal handling also influence results. Some specifications sound impressive but feel ordinary in use. Test fast movement, scrolling text, and low-light footage. I would also repeat the test after calibration, because performance can change slightly.
7 Tips for Choosing the Right LED Display Module
Check Module Size, Compatibility, Installation, and Maintenance
Before ordering, measure the cabinet opening, not just the old module. Confirm width, height, pixel pitch, resolution, and mounting-hole positions. A two-millimeter mismatch can create visible seams. Ask for a technical drawing. Record every measurement.
Check electrical compatibility carefully. Compare voltage, current, connector type, data direction, and receiving-card settings. Modules may look identical while using different scan modes. Test one sample with your controller before purchasing in quantity. Also check brightness and color consistency. Indoor and outdoor modules need different protection levels. Dust, rain, heat, and direct sunlight change performance.
Installation should allow airflow and safe cable routing. Leave enough space to remove a module without dismantling the entire cabinet. Use proper fasteners, label cables, and protect connectors from tension. I once ignored cable length, and troubleshooting took much longer than expected. That mistake was avoidable.
Maintenance access matters. Choose a design with front or rear service access, depending on the site. Keep spare modules, power supplies, and receiving cards in dry storage. Create a maintenance log with dates, symptoms, and replacements. Inspect connections during scheduled service, not only after failure. No checklist is perfect. Review it after the first installation, because real site conditions often expose assumptions that drawings miss.
7 Tips for Choosing the Right LED Display Module
Tip 1: Check reliability beyond the specification sheet. Request thermal test records, component tolerances, and protection ratings. A module should run steadily after repeated heat and humidity changes. Tip 2: Inspect the cabinet in person. Look for clean connectors, firm solder joints, and accessible service points. Loose wiring is a small detail with expensive consequences. Tip 3: Ask about maintenance history from similar installations. Real operating data often reveals weaknesses that laboratory figures miss.
Tip 4: Compare energy use at the brightness you actually need. A power meter test is more useful than maximum wattage alone. Measure daytime and nighttime settings separately. Tip 5: Read the warranty carefully. Confirm coverage for dead pixels, brightness decline, power supplies, and labor. Check response times and replacement procedures. A long warranty means little if repairs require overseas shipping. Tip 6: Calculate total cost, not only purchase price. Include installation, control equipment, electricity, cleaning, spare modules, and access equipment. Lower efficiency may quietly increase operating costs for years.
Tip 7: Test before approving the order. Run sample modules continuously for several days and inspect color consistency from different angles. I once underestimated service access, and a simple repair required removing several panels. That mistake changed the cost estimate. Recheck your assumptions. Also compare expected lifespan with the warranty period, because these figures are not always equal.
| Tip | What to Compare | Practical Benchmark | Reliability Considerations | Energy Use | Warranty Check | Total Cost Impact |
|---|---|---|---|---|---|---|
| 1 | Match the Module to the Environment | Indoor modules generally use lower brightness, while outdoor modules typically require approximately 4,000–8,000 nits, depending on sunlight conditions. | For outdoor use, look for sealed construction, conformal protection, corrosion resistance, and an operating temperature range of approximately −20°C to 60°C. | Higher brightness usually increases power demand. Select the lowest brightness that remains clearly visible in the installation environment. | Confirm that environmental damage, water ingress, and outdoor operating conditions are covered in writing. | Using an indoor module outdoors can create premature failures, replacement costs, and installation delays. |
| 2 | Evaluate Pixel Pitch and Viewing Distance | Fine-pitch modules below 2.5 mm suit close viewing; larger pitches such as 4–10 mm are often more economical for distant viewing. | Smaller pixels require tighter manufacturing tolerances and may increase the importance of uniformity, calibration, and spare-part availability. | At the same cabinet size, fine-pitch displays can use more LEDs and driving components, potentially increasing power consumption. | Check whether pixel defects, brightness variation, and color uniformity are covered by measurable acceptance criteria. | Do not pay for a fine pitch that viewers cannot resolve; choosing the correct pitch can significantly reduce the initial cost. |
| 3 | Check Power Efficiency | Compare both maximum and typical power. A representative LED module may consume approximately 250–800 W/m² at maximum brightness, depending on design and application. | Efficient power supplies and thermal design reduce heat stress on LEDs, driver ICs, connectors, and power components. | Ask for typical operating power, not only peak power. Automatic brightness control can reduce average energy use when lighting conditions change. | Verify whether power supplies and cooling components have separate coverage periods from the LED modules. | Estimate electricity cost using: Power (kW) × operating hours × electricity rate. Lower operating power can reduce long-term ownership cost. |
| 4 | Review Reliability and Service Life | A commonly stated LED lifetime is approximately 80,000–100,000 hours to a specified brightness level, but actual life depends on temperature, current, humidity, and usage. | Prioritize stable driver current, effective heat dissipation, quality connectors, low dead-pixel rates, and protection against moisture and static electricity. | Lower operating temperature and moderate drive current generally support more stable performance and reduce cooling requirements. | Request the rated lifetime conditions and the definition of acceptable brightness depreciation rather than relying on lifetime alone. | Higher-quality components may cost more initially but can reduce maintenance visits, downtime, and module replacement frequency. |
| 5 | Compare Warranty Terms Carefully | Commercial LED display warranties commonly range from 2–5 years, depending on the product category and contract terms. | Review response time, replacement procedures, technical support, spare-part availability, and whether remote diagnosis is provided. | Warranty coverage should specify whether failures caused by power fluctuations, overheating, or improper installation are excluded. | A strong warranty clearly defines coverage, claim documentation, repair or replacement obligations, labor responsibility, and shipping terms. | A longer warranty is valuable only when the supplier can provide replacement parts and service within a practical time frame. |
| 6 | Calculate Total Cost of Ownership | Include module price, cabinets, control systems, power distribution, mounting, installation, transportation, commissioning, electricity, and maintenance. | Modular front or rear access can shorten service time. Standardized components can simplify future repairs and reduce inventory requirements. | For a fair comparison, calculate energy use over the expected operating period rather than comparing purchase price alone. | Include the cost of extended coverage, preventive maintenance, spare modules, and on-site service in the financial model. | A lower purchase price is not necessarily cheaper if it results in higher energy consumption, frequent failures, or difficult maintenance. |
| 7 | Verify Testing and Installation Support | Request factory test records, brightness and color-uniformity data, burn-in procedures, protection ratings, and sample acceptance reports. | Products with documented quality control and clear installation guidance are less likely to suffer from connection errors, uneven brightness, or early failures. | Correct calibration, ventilation, cable sizing, and power distribution help prevent unnecessary energy losses and overheating. | Confirm whether installation training, commissioning assistance, software updates, and troubleshooting support are included. | Professional commissioning may add upfront cost but can reduce rework, downtime, warranty disputes, and long-term service expenses. |
Note: The figures shown are typical industry ranges for comparison purposes. Actual performance, power consumption, service life, warranty coverage, and total cost depend on the module design, operating conditions, installation quality, usage schedule, and local electricity and labor rates.